Growing tomatoes vertically

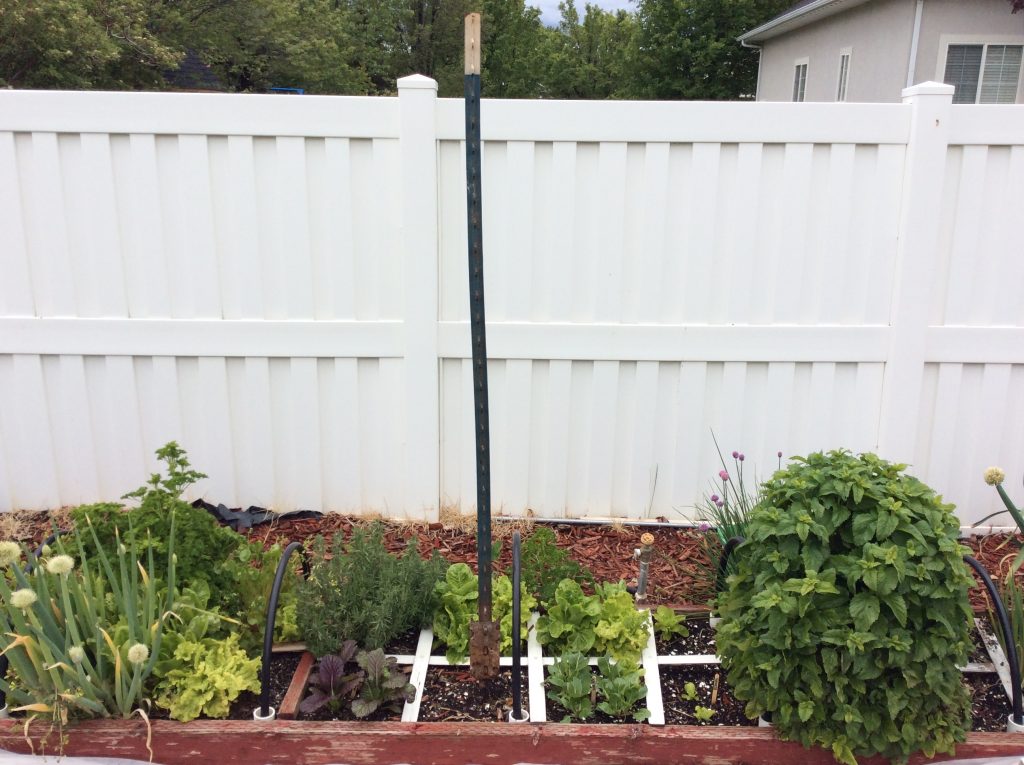
Here’s the short continuation to my last post. Using one of these, a t-post, is the perfect thing to grow your tomatoes vertically. They are solid and wont be blown over in 70 MPH winds, which is not the case with some of the cheaper and more flimsy aluminum posts that some folks will use. These cost about $5 each and will last forever.

The other important things to remember when using a t-post are: 1)growing indeterminate tomatoes, 2) keeping the suckers pinched back, 3) tying the tomato stem to the t-post every foot or so(I use velcro but string works just as well), and 4) buying the right size post. I buy 8′ posts and pound one foot of them into the ground, leaving 7′ above for the tomatoes to grow. They’re a struggle to take out of the ground by the time the season ends, but I think it’s the way to do it. My tomatoes will sometimes overshoot the tops of the post, in which case you have two options. The first is to do nothing and let them grow. My season is short enough that they don’t end up growing too much over the top. The second option is to cut them off as they overshoot the t-post.

I hope that gives you a good idea of what works for me. Speaking of what works, you ought to check out my new ebook. This is the season where it’s most applicable. As any gardener will tell you, growing summer lettuce is very difficult if you live in a geography that is hot and dry. If you live in a more moderate part of the county where you continue to get moisture through the season it might not be as hard. Lettuce seeds won’t even sprout once it gets to 80 degrees. This book explains the 5 techniques that I’ve used to successfully feed customers in our hot and very dry climate. For me, its a real downer to have vine ripened tomatoes, cucumbers, and carrots ready but no lettuce. And once you’ve had lettuce harvested from the ground 5 minutes before consuming it, you’ll never want to buy store bought again[ois skin=”3″]

How about some snow with those tomatoes?

In our geography you often hear that it’s safe to plant summer crops after Mother’s day. It’s snowed twice this week-after the tomatoes have been planted. And unless you’ve got some kind of protection, your tomatoes are no longer among the living.

Yesterday I delivered some tomato, kale, and lettuce plants to a customer. As I looked at his raised bed, you couldn’t help but notice the dead existing tomato plants, squash, and zucchini they had planted a couple of weeks ago during one of those early and rare 80 degree spring days. If you want to do that you can, but only if you’re prepared to cover your crops in case of a weather emergency.

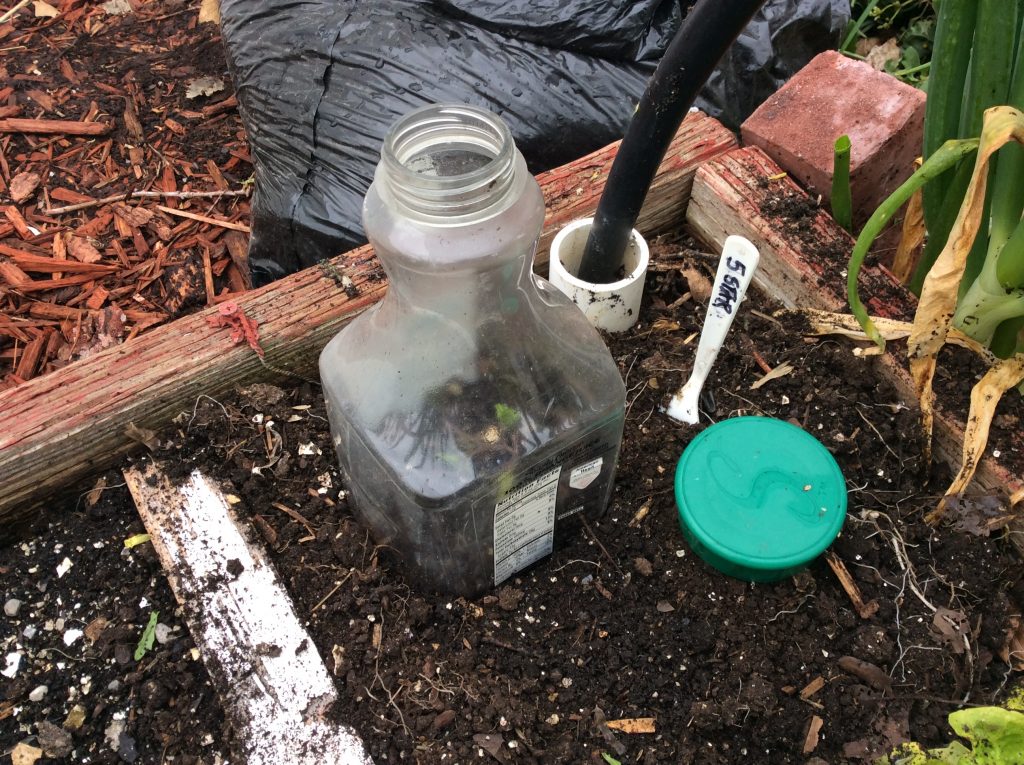
These tomato plants made it through just fine with the use of an inexpensive cloche. I don’t use anything fancy but you can spend a lot of money on them if you want. I think its a good idea to have several of these handy items available for this very purpose. Its a good thing to use when you’re first putting in your transplants as well. It protects not just from the colder weather, but also from wind, which is also a bad thing for plants just starting out.

The other nifty think I like about using cheap orange juice container such as this? If night time temperatures will be getting to low, you can simple put the cap on. It’s important to take them off the next day, especially if the sun will be coming out. After 7-10 days, I’ll remove the cloche as the weather should be safe from here on out [ois skin=”3″]

Here’s one for you: lemon balm

It’s been a while since my last post as I’ve been recovering from hip surgery, and now starting a new job.I thought I’d leave you with this picture of lemon balm. I’ve grown it for a couple of years and love it. I use it for basic things: adding it to the terrible tasting local tap water, making lemonade, etc.

This particular plant was grown last year and protected from the very harsh, cold, and wet winter we had.Lemon balm is a perennial from the mint family.It’s grown very well and now will be a challenge to keep it cut back in order for it not to shade the squares next to it.

I’ve just stumbled on to another use with lemon balm: extracts and tinctures.It can be used for all sorts of things that I never knew about.If you’re interested in learning more, click here.

Weather is warming up and that means it will be harder and harder to successfully grow lettuce!Thats what my latest ebook is about.If you’re a lettuce lover as I am and can’t stand the fact that you’ll be out of garden grown, freshly harvested lettuce to go along with those vine ripened tomatoes and cucumbers, then this is a book for you.Go ahead, it’s only $3.99, and you’ll learn the 5 tips to grow right through the hot summer months[ois skin=”3″]

Vertical gardening-a few thoughts

In 6-7 weeks it will be time to put tomato plants and other vining crops into the garden in our location. I always like to think one season ahead. It’s spring now, but I need to keep summer in mind. As I will be putting up my vertical towers soon, I need to have the squares where those towers are placed emptied out. If I wait even as little as a week and start planting any crop that takes longer than 50 days, those squares won’t be available to put in my tomato plants.

If you’ve got short term crops to put in, such as radishes or bigger scallion starts, you might still have enough time to clear out squares in time for squashes, tomatoes, etc. I’ve tried to illustrate this by the picture. The back row is completely planted and will be ready for clearing out in about 4-5 weeks. All my vining crops will be ready for planting in time for a great summer season. This takes some advanced planning but helps to make your square foot garden as efficient as it can be.

This lesson, taught to me years ago, has had to be reinforced a few times. I started my tomato seeds inside during the first week of April. When the danger of frost had passed and the time arrived for putting tomatoes out-the 2nd or 3rd week of May, those squares still had crops in them which needed another 2-3 weeks to finish growing. I could either wait until they were done, which would really put me behind, or I had to put my vertical towers in another location which were not the best. I chose the latter but had to put up with shading in the later months.

The take home lesson? Figure out where your vertical towers will be placed and fill those squares up as early as possible for them to be cleared out in time for your vining crops[ois skin=”3″]

Square Foot Gardening: The only way to go

As spring arrives across the U.S. gardeners are spending money and time at all the nurseries and big box stores. There’s a beehive of activity and it’s a great time of year. For many, it’s going be business as usually. Add some amending material to the soil, lay out your rows, and start planting. For most, the results of their garden will be what its always been: lots of work, weeding, and watering, and below expectations for the harvest.

Well, how about a gardening system that involves no heavy work or digging, no weeding, and no thinning? How about minimizing your gardening area to 20% of what you currently have? What about saving 90% of your water utilization? How about making gardening fun again?

Thats been my experience with the square foot garden. It’s so easy that anyone can do it, regardless of any previous garden experience. You don’t have to be an expert to have a great and productive garden. Along the way you’ll learn a few tricks to make gardening even more enjoyable. Tricks like this picture shows: where beginning seeds have no resistance to break through the soil. I learned this while interning with Mel Bartholomew 16 or 17 years ago. I sure miss my old friend.

I’ll have classes coming up in the next several weeks if you’re interested in learning the basics of the square foot gardening system. I’ll also be teaching an upcoming microgreens class, which is such a fun hobby, especially in the winter months when gardeners have nothing to do but watch everything turn brown and snow.[ois skin=”3″]