Making compost during the winter months

A look at one of the compost bins today.  You will be able to see a bunch of things in there-pineapple, egg shells, avocado, tomatoes, zucchini, egg shell container, etc.  I will empty the contents of my paper shredder into the bins as well.  This starts to go a long way toward that goal of getting at least five different sources of compost to make a great growing medium.  When you combine other things like dried grass, coffee grounds, leaves, banana and potato skins, etc.  you begin to see how easy it is to make homemade compost that turns out great.  After the initial purchase of peat moss, vermiculite, and Garden and Bloome compost, I have never had a need to buy more compost.  I have done this for over a decade now.  I do turn it several times a week during the growing season, but its well worth the effort.  During the winter, I just empty everything out things in the bins and don’t bother turning it over because its so cold in the winter.  There’s a lot more I add to my compost bins, but this gives you an idea.  By the time the weather starts to warm, my compost bins really start heating up.  In a matter of a few weeks I am able to produce all the compost I need in my garden boxes for the remainder of the gardening year.  Besides all the obvious things this does in terms of saving money and landfill space, the greatest satisfaction is knowing that you can make something at home that no store can come close to in terms of overall quality.  You should try it and see what you think.  One successful year of composting will have you asking yourself why you haven’t done this a long time ago…..

[ois skin=”below post”]

SFG lettuce harvest

A couple of weeks ago I went out to pull the last of our lettuce in the remaining 4X4 vinyl box.  This is what I was able to harvest.  Not bad for December in Utah.  The real bummer now is that we are stuck with buying produce in the grocery stores for about 4 months.  No wonder its so hard to get the kids to eat their greens after being spoiled with this for so much of the year.  And…the cost of lettuce in the wintertime!  It’s terrible!  I went into one of those organic stores yesterday to find the price of red lettuce at $2.50 each!  I guess if I wanted to be an extreme gardener I could grow throughout the winter.  So, now begins the long wait for the next growing season.  Believe it or not, we have just finished this lettuce after 2 weeks of it being harvested.  We square foot gardeners really love our lettuce, and we usually grow a lot of it.  But, how do you keep your lettuce from going bad when you end up harvesting so much?  If your anything like me, you hate throwing away food, especially that which you have grown.  I cover this topic in my new ebook which will hopefully be available soon.  I was planning on having it ready before Christmas but now I’m not sure I will make it by that date.  But, it will certainly be available in time for spring.  Its a quick read and a lot of fun.  Its really directed at square foot gardeners who might have had difficulties in the past, and also to those just looking for some additional ideas.  There are a lot of little tricks and tips in the book that I think you will find helpful.  Have any of you ever tried your hand at writing a book?  Let me tell you, it’s very difficult-at least it was for me…wishes to all for a happy holiday season and the best for the new year….[ois skin=”below post”]

Done with SFG for the year…

With the gardens completely put away for the winter, I start to enter my least favorite time of the year.  I’m not sure what I will be posting for the winter months-I kind of feel like I need to add something, but not sure what.  I will be involved in some trial things Mel is looking at to add to his available products from the foundation.  Maybe I will just do some updates on those.  Two of these things should be a lot of fun.  I just received the instructions for one of them, and maybe I should put that on as a post because I will need to know if anybody here speaks Japanese.  That’s the language the instructions are written in.  But, the product looks very promising.  Its a special cover that is used to protect plants that help to heat up the gardens, stop them from getting too hot, and completely eliminate things like the white butterfly that seems to destroy brussel sprouts, cabbage, etc.  The Japanese instructions are to an apparatus that supports this growing cover.

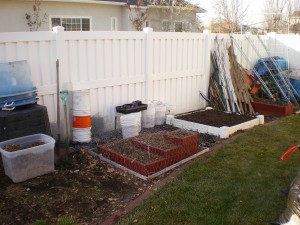
 I just received the new Johnny’s Seed catalog.  Its my favorite one of all the catalogs that arrive this time of the year.  They have added quite a few new things in this one.  It looks like they have spent a lot more time on helping growers to increase their profitability with some additional ideas.  Those covers they sell for CSA’s look like a lot of fun.  But, I don’t have the room to do that, and I don’t have the time.   That is why I will be selling just one “share” of fresh produce and veggies to one family this upcoming season.  It will be an experiment, but I think I can do just as well as some of the local CSA’s.  I will provide a little more than what they normally receive.  One of the things I will be growing is strawberries.  The 3X3 red box you see in this picture was used for this last year.  But, I will be planting a new variety of strawberries-the ones that are bigger.  You can also see what I use to protect them from the birds.  It works great.  I made it to fit right over the box and to rest on the ground….

[ois skin=”below post”]

How to make the perfect soil..for next years SFG

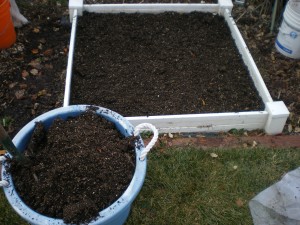
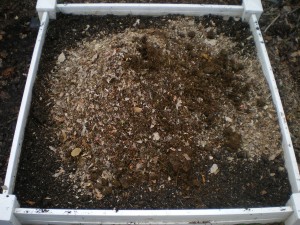
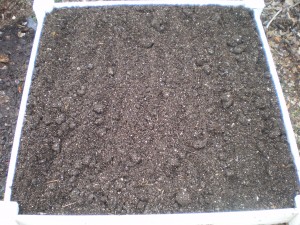
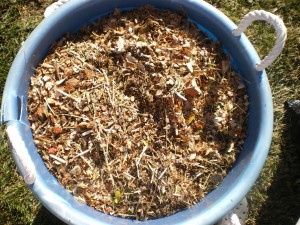
Here it is the last week of November and Im still doing things out in the garden.  I will have a nice picture of a portion of the last of the ’11 SFG season.  It really turned out to be another bumper crop year for us.  As time goes on, I am always hoping to give some little tips that I have used in my square foot garden.  I know there are many people who have had the total opposite experience that I have had with a SFG.  As I make my way to other gardens and teach classes, this usually boils down to two basic and correctable mistakes folks make when attempting to grow a SFG.  I spend time talking about this in my new ebook which should be available in about another week.  Boy, this whole website, ebook, WordPress, e-commerce thing sure has a serious learning curve!  Its been hard for me but I’m starting to get little pieces of it.  The first thing I do at the end of the season is to remove about half the soil and put it in a plastic tub as shown.  With my pitchfork, I loosen up the existing soil in the box, making sure I get all the corners.I then dump a lot of composted material in the box.  This is made up of all the things in my compost pile(about 20 different items), shredded twigs and leaves, and horse manure.  That’s quite a bit of organic material to add.  I will spread this around evenly.  Believe it or not, this really smells good.  When this is done, I then take the left over soil that I removed earlier, and top the garden off.  All that is left to do is to make sure its leveled-out and let it sit for a few months.  This particular garden had 3 growing seasons-produce in the spring, carrots, beets, cucumbers,  and squash in the summer, and more lettuce in the fall.  As much as I like the looks of the vinyl box, I still think I prefer the wood.  This was given to me by Mel many years ago as a leftover because he was working on a new box design to sell that’s easier to put together.  And, he figured it out.  The vinyl boxes sold by the foundation are great-but a little expensive.  Then again, you never have to treat or stain them, so maybe its a pretty good trade off.

[ois skin=”below post”]

Winterized square foot gardens

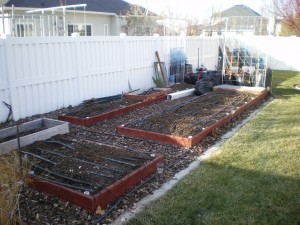
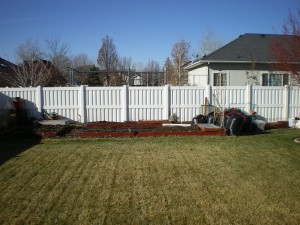
It’s pretty normal to now have hard freezes every night.  For the most part, my work is done for this year.  The square foot garden boxes have all been amended with a blend of compost, leaves, and a light horse manure mixture.  This past weekend found me raking and gathering the leaves in our yard.  I think its safe to say that most folks probably don’t like this work-but, I absolutely love it.  I know what I am doing now will pay off big next year with my 12 or more bags of leaves.  What I really love is the smell of those leaves in the black plastic bags.  I cant explain it in words very well, but those of you who know what I’m talking about can relate to that smell.  I also painted all of my boxes before the real heavy snowfall will hit.  I could have done it in the spring, but then I would lose 3 or 4 months of it getting hammered by our winter season.  I kind of like to think of my raised boxes as an investment.  I want them to last as long as possible.  This is my way of doing just that.  These boxes are now about 12 years old and still holding up very well-with the exception of a couple of corners where I didnt follow the rules for building the boxes.

You know what they say about not following the rules-if it doesn’t work, you cant complain.  So, I’m not complaining, I’m just doing all I can to make it last.  When I amend my soil for winterizing, I try to empty both of my compost units into the boxes.  I then will top that off with leaves-not even leaves that have been run through the shredder or lawn mower-just plain old leaves.  Whats next is a mixture that I have always used successfully.  With all of our shrubs, trees, etc. that we have in our yard, we get a lot of things that I can run through my shredder.  I will put all of those items through, and I will then start to shred some of my leaves.  I mix in about half of one of these blue Rubbermaid tubs with horse manure and then toss everything together.  You can imagine what this looks like when I come back and heat my gardens up in the spring.  Its perfect soil.  All those regular leaves?  Gone!  Earthworms to the rescue and now ready to plant in a great growing medium.  You don’t need to wait years for the perfect soil…this system shows you how to do it the first year….[ois skin=”below post”]