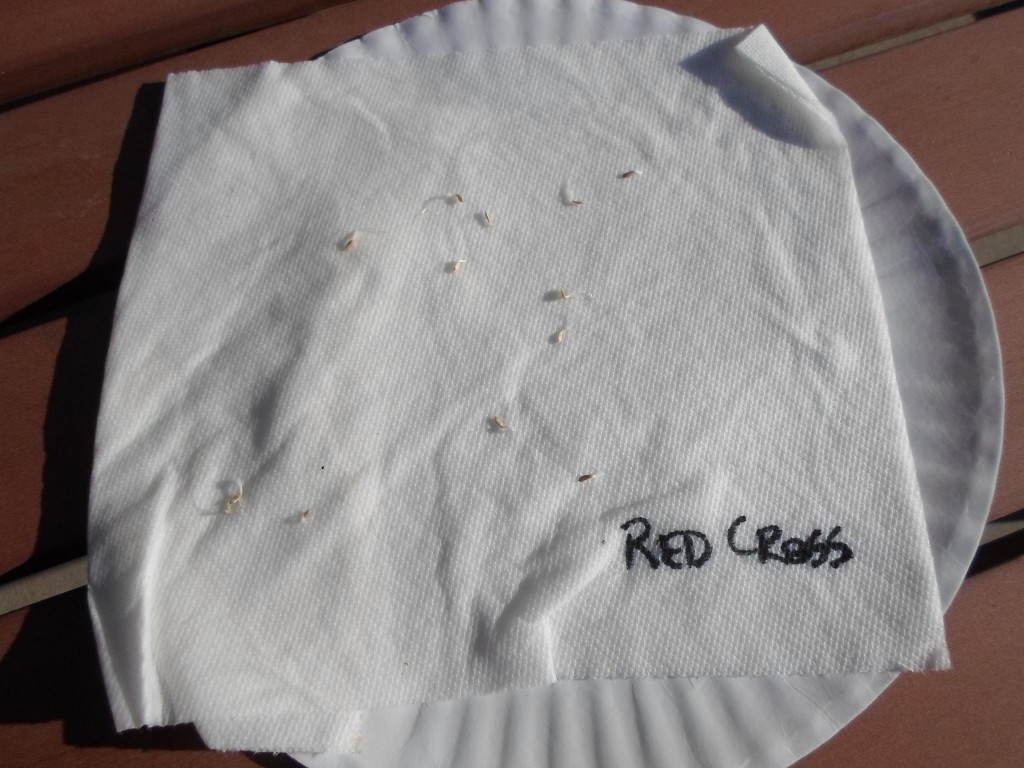
 This is for those who attended the SFG workshop at Thanksgiving Point this past Saturday. As an example of one way to get seeds started, I had one of the participants wet a paper towel, add a few seeds, place it on the paper plate, and then close it up. I kept this upstairs on a counter and by Sunday night, a few had already sprouted. By Monday, they all had. These have all been gently lifted out and placed in potmakers where they will continue to grow. In 3 weeks they will be ready to go outside in the garden. Pretty good way to plant. Hope it gives you some ideas.[ois skin=”below post”]
A great question
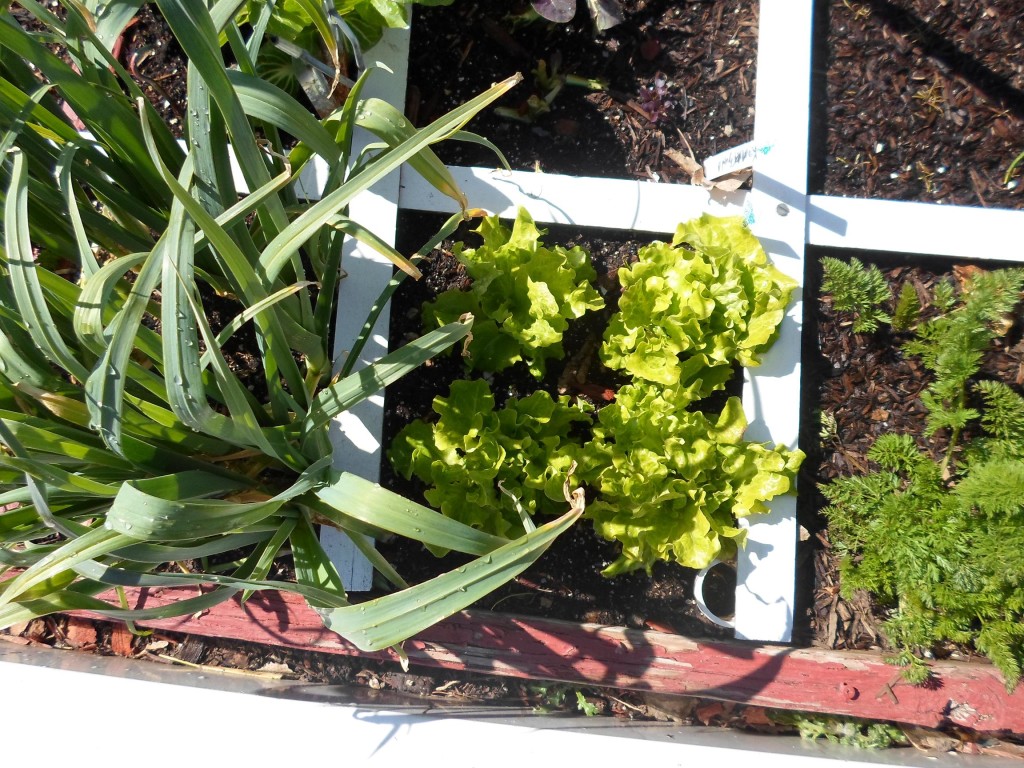 One of the participants in our SFG workshop today asked about putting together a SFG garden box that will be placed on cement. We talked about how to put plywood on the bottom of the box and then to screw(not nail)it down. Then fill it with soil,add a grid and start planting. “What about earthworms? How will I get earthworms in my box if it’s got a bottom and its on cement?” It’s a good question. Regardless of folks claiming that yard worms are different than garden worms, or that red worms are different that brown worms, the thing to look at is this: what’s the purpose of earthworms? Easy-they do two things that are important. First, they aerate the soil. Second, they leave behind their castings which act as a fertilizer. When this new box is built, there will certainly be no earthworms in the soil. However, the benefits of earthworms are already met with Mel’s mix. We already have a light and very fluffy soil(takes care of issue one), and we have 33% or organic growing medium(takes care of issue two.) Earthworms aren’t a necessary part of a SFG because of these two points. But, as you add your own homemade compost when amending soil throughout the year, you’ll end up with earthworms in your Mel’s mix anyway. It will just take some time. This is an example of how simple and easy the SFG system is. You don’t need to know the first thing about gardening to make it work. No need to make thing complex, after all, it’s soil, a seed, water, and sun. Build a box, fill it with soil, add a grid, start planting. Spacing is 1, 4, 9, 16. Rotation is any combination of fruit/root/leaf crops. How simple can it get? Anybody can do it when it’s this easy. Picture is megaton leeks and black seeded simpson lettuce. All looking good and getting close to harvest….yum, yum.
[ois skin=”below post”]
You should taste this little gem
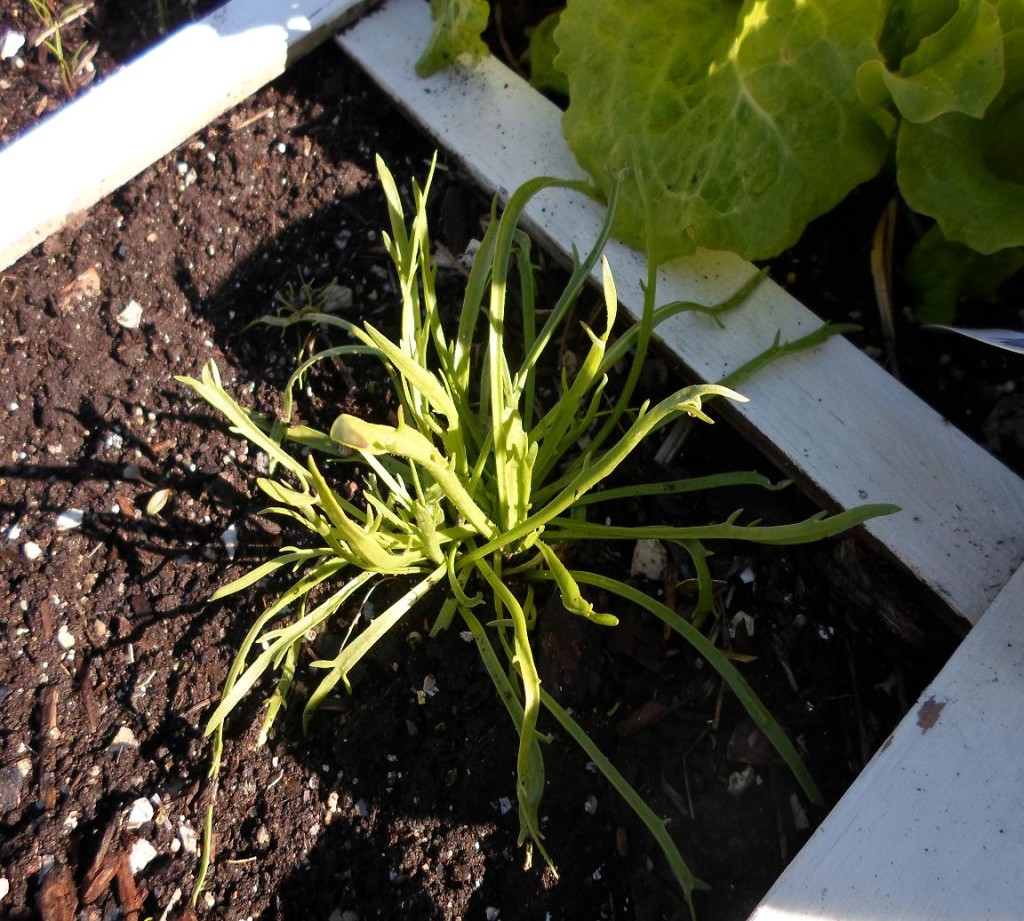 I’ve learned a lot this winter about many crops that I’ve never had before. They continue to surprise me and our dinner guests that have a chance to have one of our “artisan” salads. If I had to list the biggest surprise I would list claytonia as the top. After that I experimented with 10 new crop varieties. It would be difficult to prioritize them after claytonia. They were all exceptional, but claytonia was just unbelievably delicious. This is a picture of buckshorn plantain. It’s crunchy with a little zest to it and adds a wonderful texture and taste to whatever salad mix your putting together. You won’t be buying this in any stores or any farmers markets this time of year. If you want it, you’ll have to grow it yourself. And it’s virtually unscathed in my protected square foot garden. You should give it a try. If you’re interested in buying some seeds(they can be hard to find)of this particular variety, I sell and ship them for $4.25 per pack. But if you wait too long it won’t be good. This is a cool/cold weather crop that does well with a lack of heat.
[ois skin=”below post”]
Poc choi
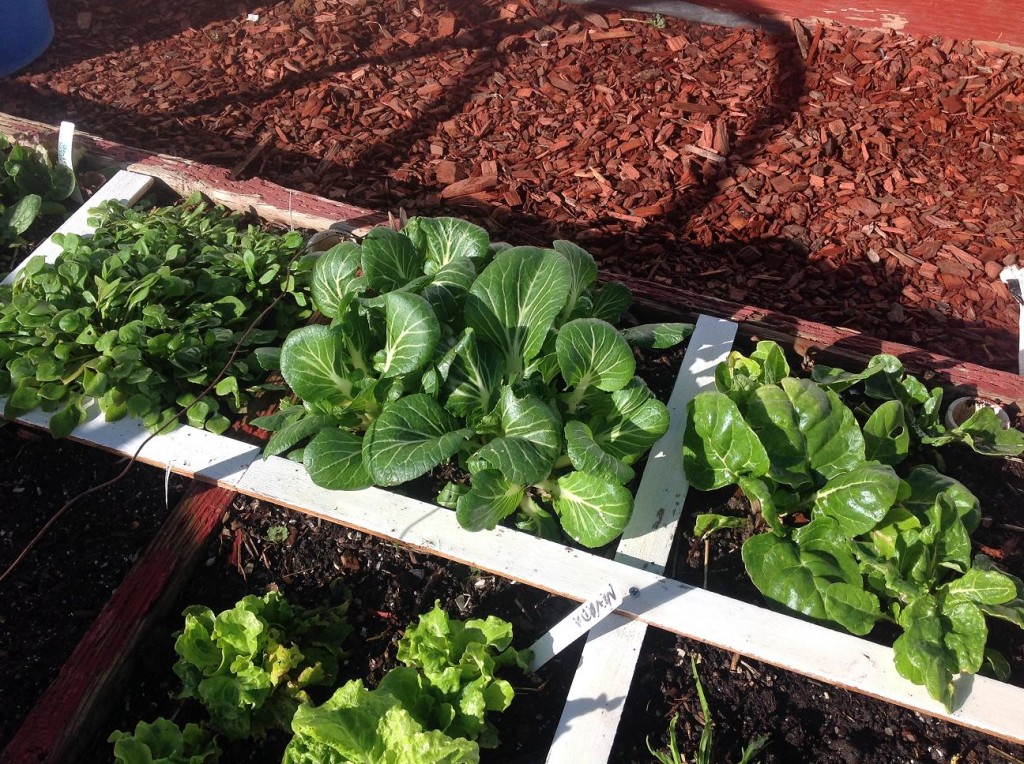
It’s the 1st week of March and I’ve got hardly any room left to plant. I’m hoping to have my first full harvest by the 1st week of April-for sure by the second week. This is Win-Win poc choi-one of 3 different varieties that I grow throughout the year. This particular cultivar produces a very large and open plant. It’s exceptionally good in stir-fry’s. On the left is Clayton-which I’ve previously posted about. It’s been the surprise of the winter garden in zone 6 for me. On the right is Fordhook chard. I like this variety but I think I’m a bigger fan of rainbow chard, which has been planted in other squares of the garden. We’re still eating out of the garden from the winter harvest with much left of spinach, minutina, mache, tatsoi, mizuna, and mache. With several local customers to grow for I’ll be spending a little more time in the gardens. With the mild weather we’ve had so far I’m taking a chance that it’s OK to begin teaching garden classes. For the local folks interested in learning how to have a successful square foot garden, you can reach me through the “contact” page. Or, you can just check out the schedule on the right hand side of my blog. It’s a lot of fun and you won’t be sorry you attended. Gardening season is here and you can be direct seeding many things right now for an earlier harvest.
[ois skin=”below post”]
Step 4: Start planting!
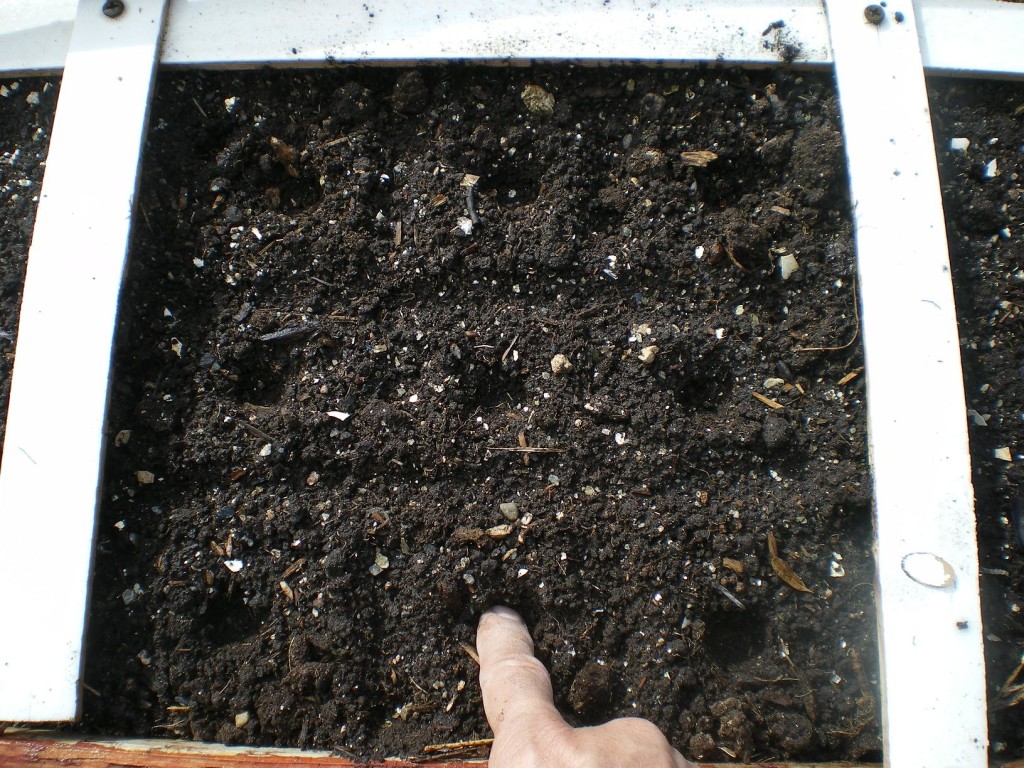
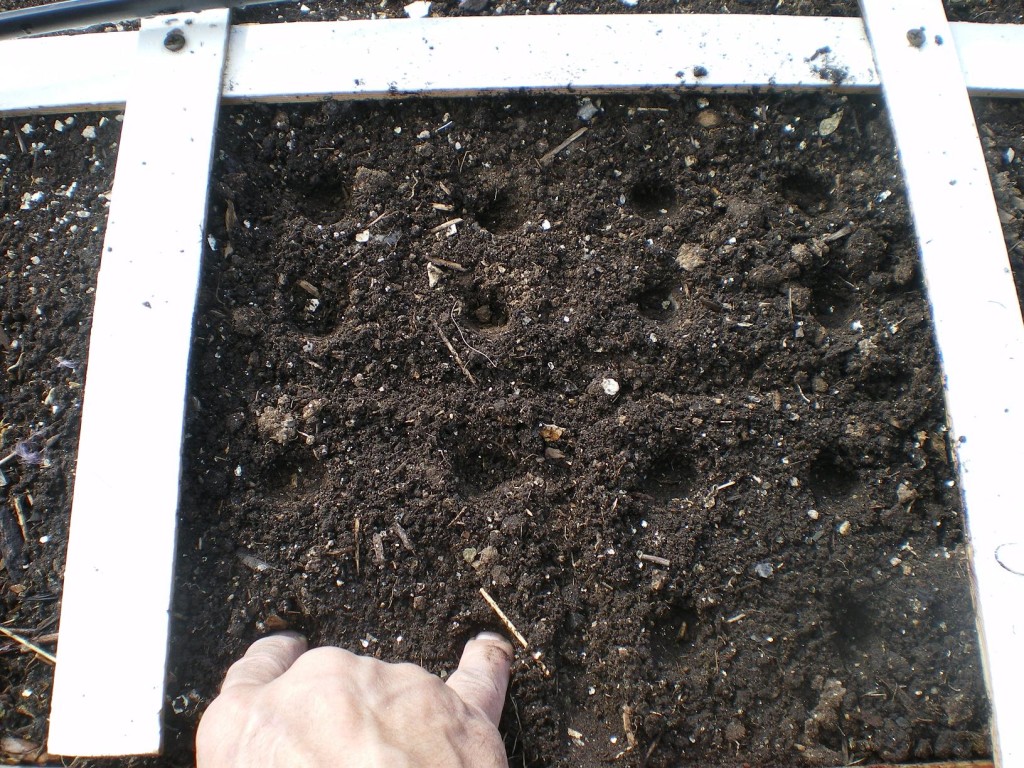 It’s that easy! This is all you need to have a great garden. Now all that’s left is the spacing. In the SFG system, this is simple too. As a general rule things will be planted in 1, 4, 9, or 16 items per square. You’ll know by what the seed packet lists as the “thin to” spacing. As an example, broccoli will say “thin to 12.” This means there will be one broccoli plant per square. If you’re using transplants it’s easy-just drop it in the middle of your square. If you’re using seeds, you only need to add 2 or 3 seeds into each hole. That’s it! If all 3 of those seeds grow you can either cut them back with a scissors(a tough thing to do)or you can gently come under the early starts with a pencil and carefully lift them out. You now have another broccoli plant that’s germinated and can become a full plant. If the packet says “thin to 6 inches” you will plant 4 items per square. “Thin to 4 inches” will mean you’ll plant 9 items per square, and the last one-“thin to 3 inches” means you’ll be planting 16 items per square. The following is a short list of the spacing used in the SFG system. One per square: broccoli, cauliflower, eggplant, tomatoes, kale, brussel sprouts, basil, rosemary, and cabbage. Four per square: all lettuce, chard, pok choi, radicchio, arugula, marigolds, nasturtium, and cilantro. Nine per square: beets, leeks, chives, spinach, garlic, onions, mizuna, tatsoi, kohlrabi, and bush beans. Sixteen per square: radishes, turnips, parsnips, carrots, mache, and scallions. Keep your soil moist-especially at the beginning and you’ll be rewarded with a garden that you never knew could be so much fun and so little work.[ois skin=”below post”]

