Category Archives: Summer gardening

Harvest basket from the square foot gardens

Just a sampling of what my neighbor customers get every Saturday morning. Not much work really, just several washes of the greens and off they go. The one item that’s been very surprising is the small yellow squash in front. Angel hair spaghetti squash. This was my first year growing it, and it’s just delicious. You can read all about it here. Give it a go next year, you won’t be disappointed.

Chard, arugula, zucchini, basil, cherry tomatoes, golden egg squash, green onions, cucumber, kale, lettuce and carrots.[ois skin=”1″]

Spring salad mix

Hopefully you’re beginning to harvest the work you did in springtime. Its salad galore! This is a combination of 8 different greens, one of which is something I’ve grown for the first time: endive. I always associated it with the frilly, sharp, bitter, and what I would describe as unattractive in salads. But then I learned about the different kinds.

This variety was not bitter at all. Chicory’s have been a bit of a challenge for me to grow for this reason. I think it has to do with the season you try to grow them in. My radicchio variety was very tasty in the spring, but got bitter when I grew it in summer. The ones I grew later in the year returned to less bitter.

Regardless, it’s very tasty in this mixed salad. Add some fresh fruit, cheese, homemade croutons, candied nuts(sorry!),avocado, and a great blush vinaigrette and you’ll have yourself a great tasting salad for the evening. Fast, great tasting, easy, cheap, and very nutritions[ois skin=”1″]

Kale in the summer garden

Kale is thought of as a cool weather crop, and it is. Kale wouldn’t normally do very well given our very, very hot summer temperatures we’ve experienced this summer. Aphid infestations are common in our geography this time of year, and it begins to not even look good. We’ve had a scorching summer: 95+ for over a month, with several days in the low 100’s.

I’ve kept this plant covered and watered it more than I normally would have. Its looks great and we’re almost getting ready to say good-bye to these high temperatures, which will make my job easier. The goal was to have great tasting kale in the summer and then have it last throughout the entire fall, where it gets sweeter after the first frost.

And for the local folks wanting to know what those kale plants I sold a couple of months ago should look like, this is it. This is the same crop you bought and it was planted on the same weekend you received yours. Keep it well watered and cooled down if you can, and you’ll be rewarded with a great tasting fall crop of kale.

In just a few weeks it’ll be time to planning a winter garden. I’m teaching a class on how to do just that. If you’re local and are interested in learning how to do it, click here for more information. I’ll probably only be doing one of these.[ois skin=”3″]

Growing tomatoes vertically

Here’s the short continuation to my last post. Using one of these, a t-post, is the perfect thing to grow your tomatoes vertically. They are solid and wont be blown over in 70 MPH winds, which is not the case with some of the cheaper and more flimsy aluminum posts that some folks will use. These cost about $5 each and will last forever.

The other important things to remember when using a t-post are: 1)growing indeterminate tomatoes, 2) keeping the suckers pinched back, 3) tying the tomato stem to the t-post every foot or so(I use velcro but string works just as well), and 4) buying the right size post. I buy 8′ posts and pound one foot of them into the ground, leaving 7′ above for the tomatoes to grow. They’re a struggle to take out of the ground by the time the season ends, but I think it’s the way to do it. My tomatoes will sometimes overshoot the tops of the post, in which case you have two options. The first is to do nothing and let them grow. My season is short enough that they don’t end up growing too much over the top. The second option is to cut them off as they overshoot the t-post.

I hope that gives you a good idea of what works for me. Speaking of what works, you ought to check out my new ebook. This is the season where it’s most applicable. As any gardener will tell you, growing summer lettuce is very difficult if you live in a geography that is hot and dry. If you live in a more moderate part of the county where you continue to get moisture through the season it might not be as hard. Lettuce seeds won’t even sprout once it gets to 80 degrees. This book explains the 5 techniques that I’ve used to successfully feed customers in our hot and very dry climate. For me, its a real downer to have vine ripened tomatoes, cucumbers, and carrots ready but no lettuce. And once you’ve had lettuce harvested from the ground 5 minutes before consuming it, you’ll never want to buy store bought again[ois skin=”3″]

How about some snow with those tomatoes?

In our geography you often hear that it’s safe to plant summer crops after Mother’s day. It’s snowed twice this week-after the tomatoes have been planted. And unless you’ve got some kind of protection, your tomatoes are no longer among the living.

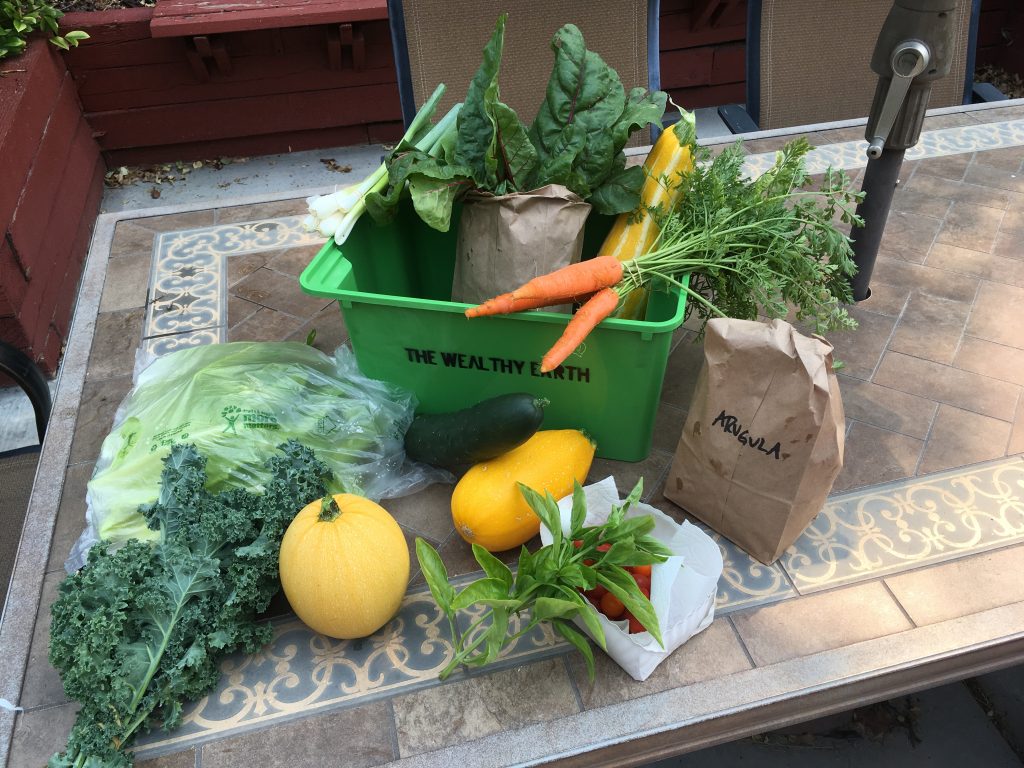
Yesterday I delivered some tomato, kale, and lettuce plants to a customer. As I looked at his raised bed, you couldn’t help but notice the dead existing tomato plants, squash, and zucchini they had planted a couple of weeks ago during one of those early and rare 80 degree spring days. If you want to do that you can, but only if you’re prepared to cover your crops in case of a weather emergency.

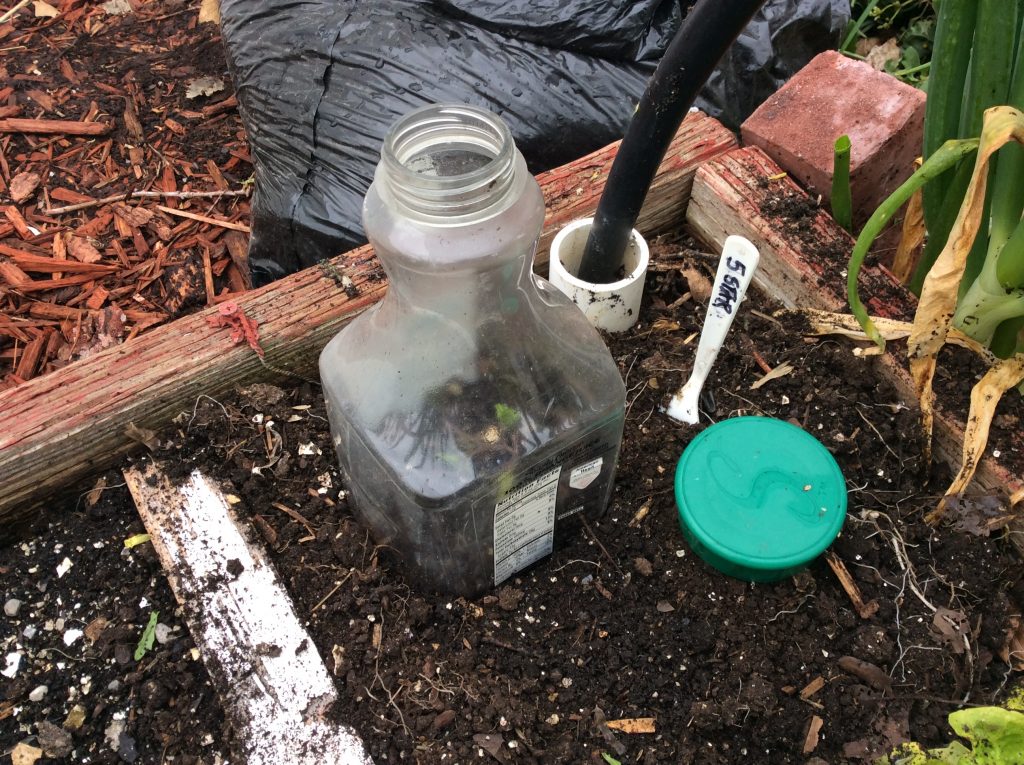
These tomato plants made it through just fine with the use of an inexpensive cloche. I don’t use anything fancy but you can spend a lot of money on them if you want. I think its a good idea to have several of these handy items available for this very purpose. Its a good thing to use when you’re first putting in your transplants as well. It protects not just from the colder weather, but also from wind, which is also a bad thing for plants just starting out.

The other nifty think I like about using cheap orange juice container such as this? If night time temperatures will be getting to low, you can simple put the cap on. It’s important to take them off the next day, especially if the sun will be coming out. After 7-10 days, I’ll remove the cloche as the weather should be safe from here on out [ois skin=”3″]